How to prepare your model in Navisworks.
Below are instructions on getting your Navisworks models ready for the BIM Holoview app.
If you need help with using the BIM Holoview application click here.
If you need help with your Revit model click here.
For tips to make sure the Automatic Coloring works as expected please click here.
For tips to get the best results for printing QR codes please click here.
BIM Holoview Navisworks plugin
If you dont want to use the plugin to upload your files then click here.
Download the Navisworks plugin here

Install the plugin using the install wizard. Follow the steps until installation is complete.
Using the plugin
Reference markers
Please note: If you already have the reference points in your model then you may skip to logging in/uploading here.

|
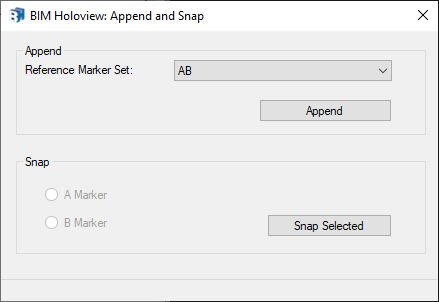
Append the reference points.
- Click on the button in the toolbar called Append and Snap
- Select desired marker set from the dropdown:
- Click Append.
|
|
|
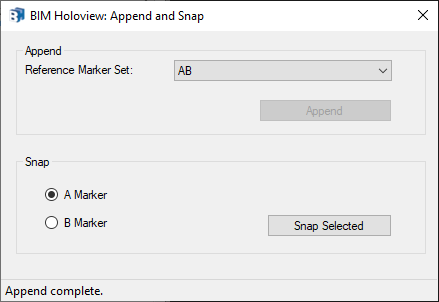
Snap the reference marker to a specific object.
- Find the desired object to snap the first reference marker to and select it.
- Bring the Append and Snap window back up by clicking on it in the task bar or by clicking the Append and Snap button again.
- Choose the individual marker:
- Click Snap Selected.
- Repeat for the second reference marker.
Repeat the steps above if you want multiple sets of reference markers in your model.
|
|
Logging in and uploading
|
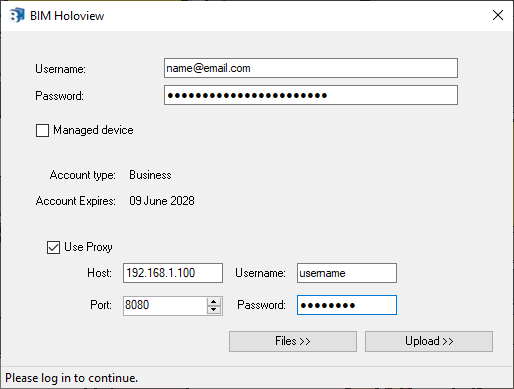
Log on using the credentials you use to sign in at bimholoview.com
If you are required to go through a proxy then click the Use Proxy checkbox to input your proxy details such as:
- Host
- Port
- Username
- Password
Files takes you to a list of your currently uploaded files.
Upload takes you straight to the upload section.
|
|
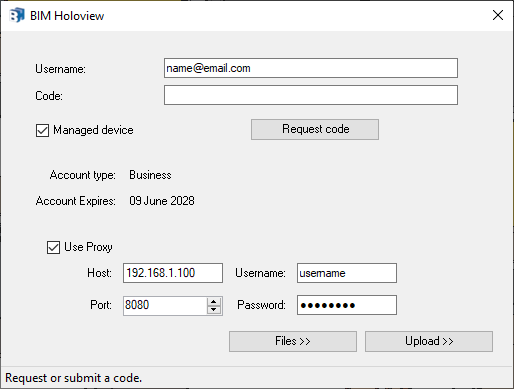
If you're account has Single-Sign-On enabled, you can sign in using the managed device checkbox option:
- Tick the Managed device checkbox
- Enter the email you use to sign in at bimholoview.com
- Click the Request Code button and wait for a pop-up letting you know to check your email.
- This will send a request to the server, verify your Single-Sign-On details and send a 1-time use 6-digit code via email. Enter that code into the Code field.
- Then click one of the buttons below to confirm the code:
- Files takes you to a list of your currently uploaded files.
- Upload takes you straight to the upload section.
|
|
|
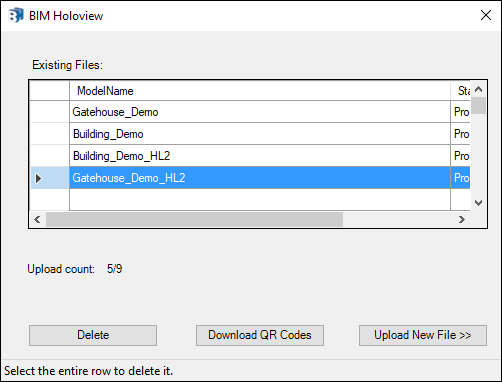
The files form shows your existing uploaded files.
- Select a row and click Delete to delete the model from the BIM Holoview server.
- Select a row that is a HoloLens 2 model and the Download QR Codes button will become enabled. Click this to download the QR codes for that model.
- Click Upload New File to go to the uploads section.
|
|
|
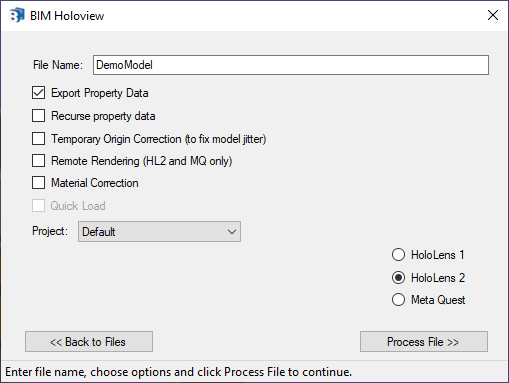
To upload your file, input your desired file name, select the desired settings and click Process File.
- Export Property Data will upload property data gathered from Navisworks and process it with your model to be viewable in the BIM Holoview application.
- Recurse property data will recurse up each parent object searching for the text provided in the property data and will retrieve the property data of that node instead of the child node.
- Temporary Origin Correction will correct your models origin during the processing and then place it back to its original location. This prevents model jitter.
- Remote Rendering (HoloLens 2 and Meta Quest only) will only be enabled if you have HoloLens 2 or Meta Quest selected and your account is ARR enabled. This will make the model be rendered remotely which can allow for much larger and complex models.
- Material Correction will improve the coloring of the materials if some colors aren't coming through on the device.
- The Project dropdown will list all of your projects. Select the project you want your model to go into.
- Select Device version:
- HoloLens 1
- HoloLens 2
- Meta Quest
Once uploading has started please wait until the buttons become active again and you see the message "Uploaded to server, awaiting processing..." to continue using the plugin. Once the file is uploaded, if it is a HoloLens 2 model then you will have the option to download the QR codes for the model at the end too.
|
|
Watch this video for a demonstration of using the Navisworks plugin